Overview
The Leverage Icon Module allows you to display icons or images with customizable text and buttons, making it ideal for showcasing features or services.
Instructions
1. Add the Module:
-
- Navigate to Extensions > Modules > New and select Leverage Icon Module.
2. Configure Module Settings:
-
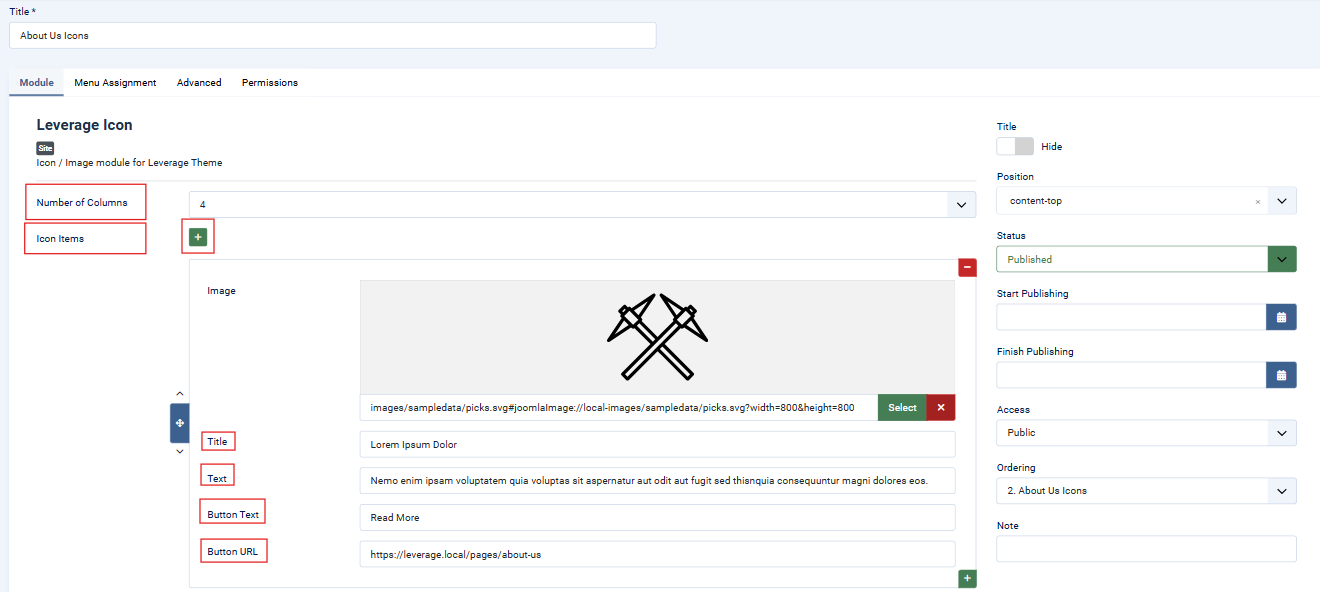
- Number of Columns: Set the number of columns for the layout (e.g., 4).
- Icon Items: Add items by clicking the + button:
- Image: Select an icon or image for the item.
- Title: Enter the title of the item.
- Text: Add a short description.
- Button Text: Enter button text (e.g., "Read More").
- Button URL: Specify the link for the button.

-
Position and Status:
- Assign the module to a position (e.g.,
content-top). - Ensure the module Status is set to Published.
- Assign the module to a position (e.g.,
3. Menu Assignment:
-
- Under the Menu Assignment tab, assign the module to specific menu items or pages.

4. Advanced Settings:
-
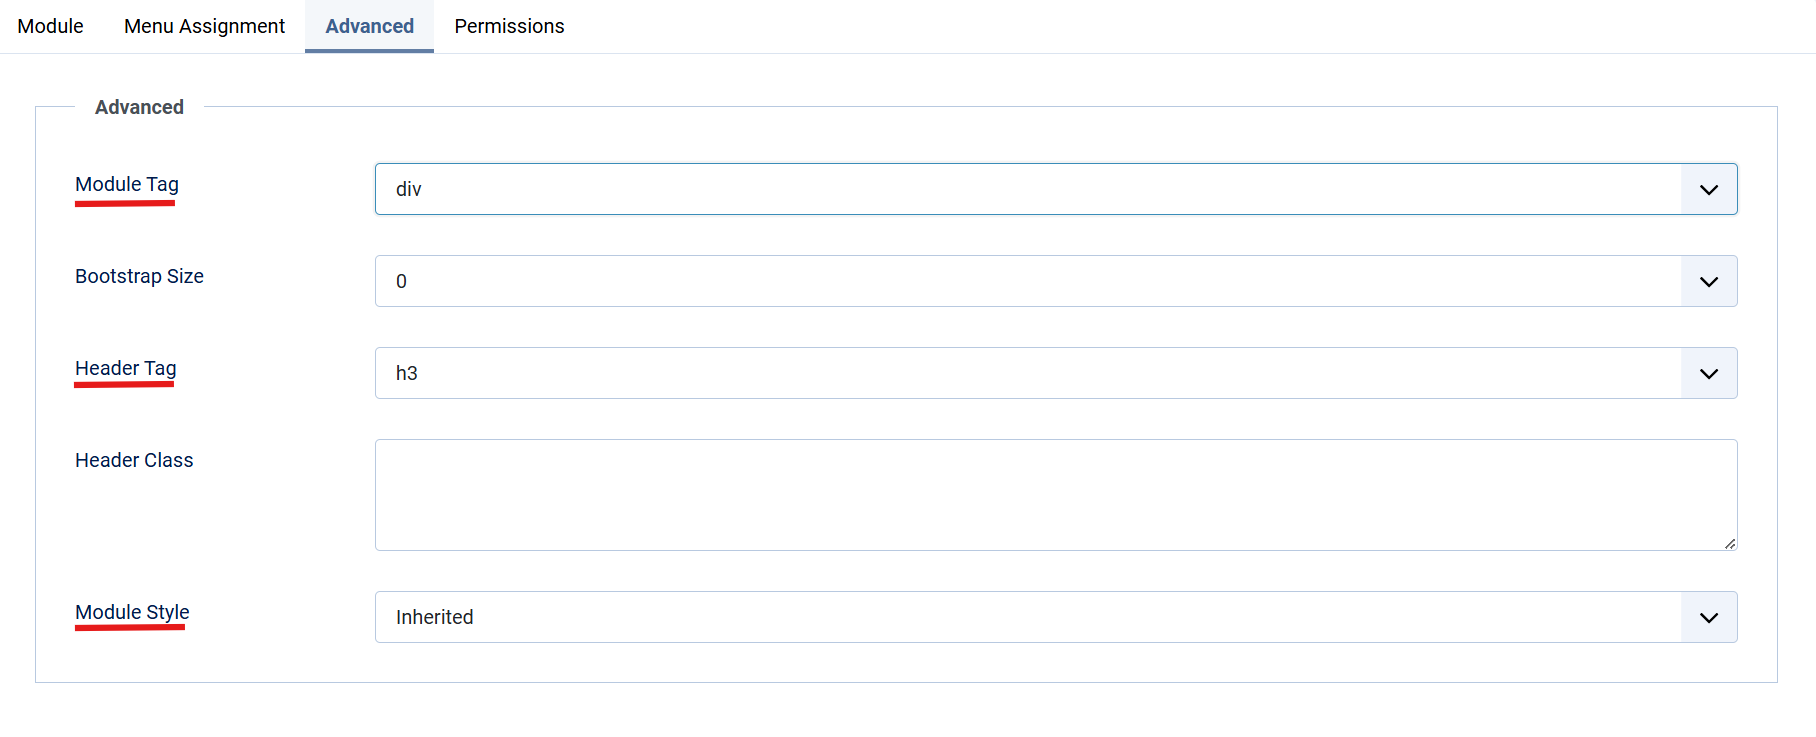
- Customize the module’s HTML tag (e.g.,
div), header tag (e.g.,h3), and CSS classes. 
- Customize the module’s HTML tag (e.g.,
5. Permissions:
-
- Configure user permissions for editing, deleting, and accessing the module under the Permissions tab.
Lastly, Save and close the Module.


